email: info@moetryplay.com



-
 Airplane Children’s Outdoor Playground
Airplane themed children’s outdoor playground equipment with S shaped slide and single open slide.
View now
Airplane Children’s Outdoor Playground
Airplane themed children’s outdoor playground equipment with S shaped slide and single open slide.
View now
-
-
-
 A fun place for whole family. We provide play equipment for children.
 -
 Our product range perfectly cover what a childcare center need, either new center or existing one.
 -
 Play can have a special therapeutic value for ill children in hospital or pediatric therapy center.
 -
 Playgrounds bring the parents and children together to relax, play and make friends.
 -
 Playgrounds make hotels more family-friendly and encourage families to visit and stay.
 -
 Our products help children learn about history and future through all kinds of interactive play.
-


How to Install Kids Interactive Ball Wall Step by Step
Release time:
2024-08-14 14:24
Source:


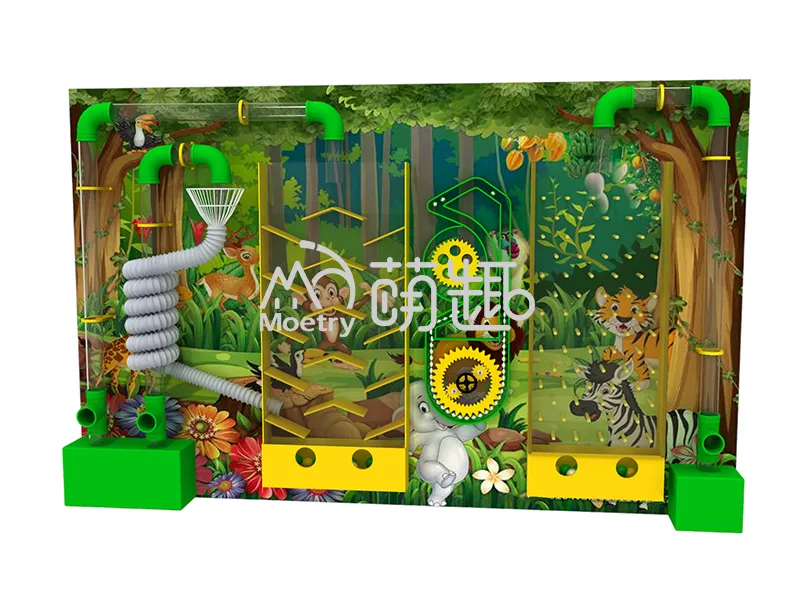
The kids interactive ball wall is an educational play equipment for children to learn about the power of air through the transportation of balls in the air tubes and the mechanics world with the gear walls. It is widely used in family entertainment center, amusement park, children's museum, preschool, school and other kids educational center.
You might wonder how to install the interactive ball wall or whether it is hard to install when you receive our ball wall games or before you order. Here we will introduce how to install it.
Actually the ball walls are shipped half assembled, you only need to combine the few big pieces together, fix them on wall and install some small parts. You will see it is not hard at all, so you can rest assured to place your order.


(We use plywood crate for international transportation, inside the wooden crate are half assembled ball wall games)
Site Condition:
Hard concrete wall with thickness no less than 15cm.
Tools Required:
Wooden crate opening kit
Electric drill
Screwdriver
Installation Step by Step:
Step 1: Open the wooden crates carefully to avoid damaging the products inside
Step 2: Place the panels in order beside the wall according to the product pictures
(note that the power cord needs to be pulled out, if there are multiple power cords, they can be connected together)

Step 3: Install the accessories on the back panels
(most of the accessories have been installed, few accessories at the connection between the two panels need to be installed after you receive the goods. According to the product pictures and the holes reserved on the board, use screws to fix the corresponding parts)


Step 4: Trial operation before fixing
Plug in the power cord, push the switch button to see if the ball wall work normally.
If you ordered the ball wall with light and music effect, remember to connect the LED light strip to have the light effect. For the music, you can either use TF card, USB disk or bluetooth to play the music you like.


Step 5: Fix the back panels with anchor bolts




You might be interested in
Create a safe and joyful
learning & playing space!

